By default, WordPress uses the PHP Mail function to send its emails. This has proven over and again vulnerable as PHPMail() is open and used by trojans and viruses. Most clients have infected files which just send mails using PHPMail(), because it doesn’t authenticate.
However it is better to use SMTP for sending mails as SMTP function isn’t open and the email must be authenticated; i.e, a real email address and password must be written into your code and must be verified by the mail server before the email is sent. This to an extent increases the legitimacy of emails. Below is a step by step guide on how to configure SMTP in wordpress
Step 1.
To send mails with wordpress, you need to install a SMTP Plugin. We recommend WP MAIL SMTP.
Step 2.
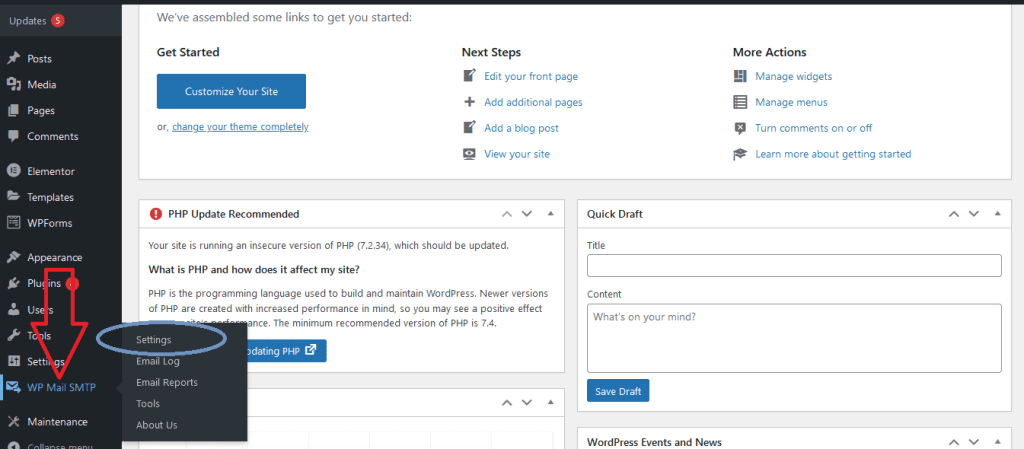
Once the plugin is installed and activated, a new menu titled ‘WP MAIL SMTP’ will show up in the sidebar of the admin dashboard. You will need to navigate to it in order to configure WordPress to work with SMTP.
Step 3. On the Settings page, you will find the configurations as seen in the images below;
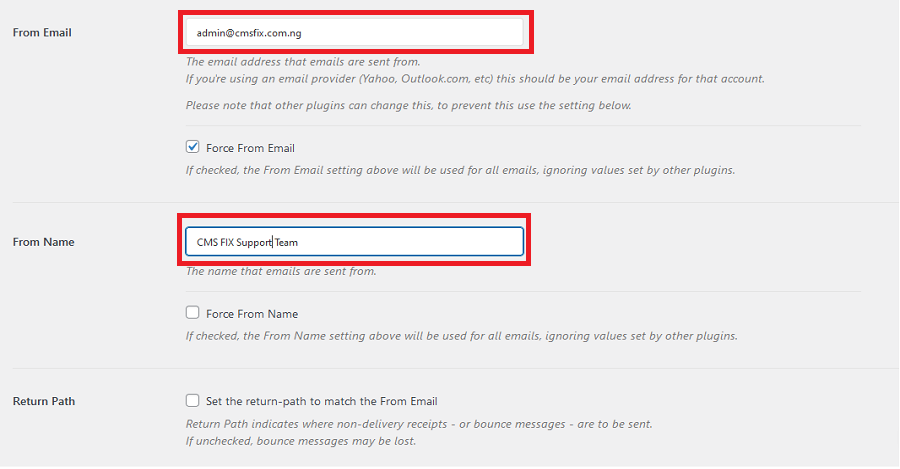
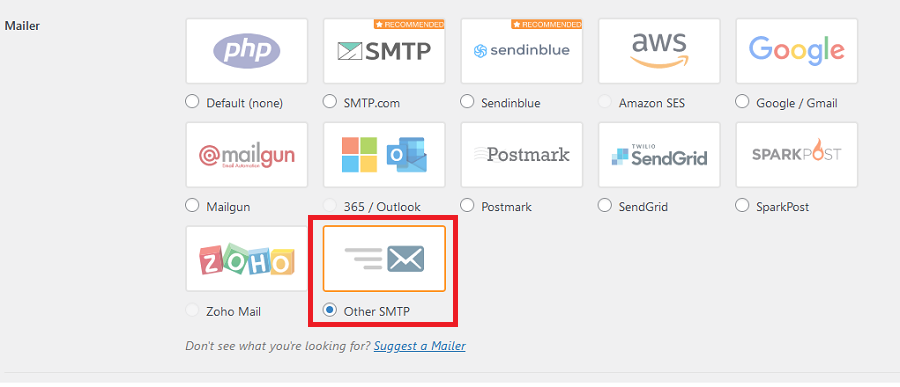
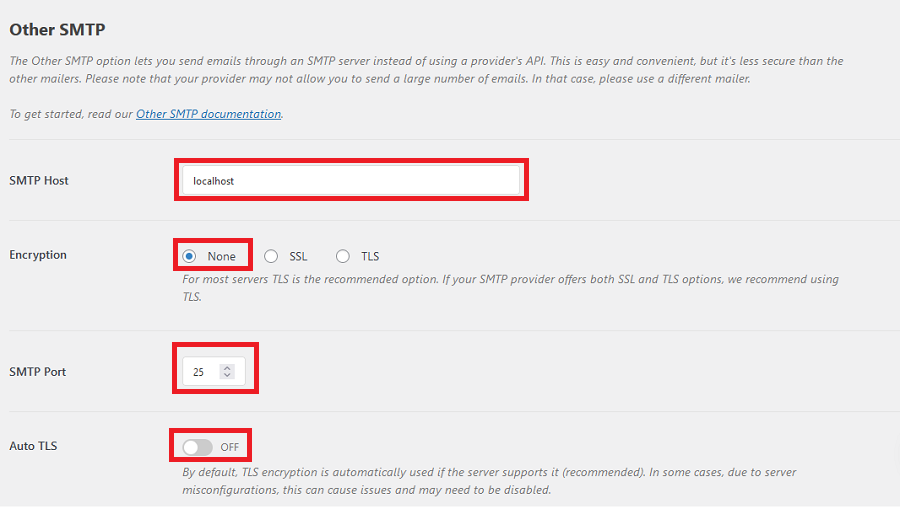
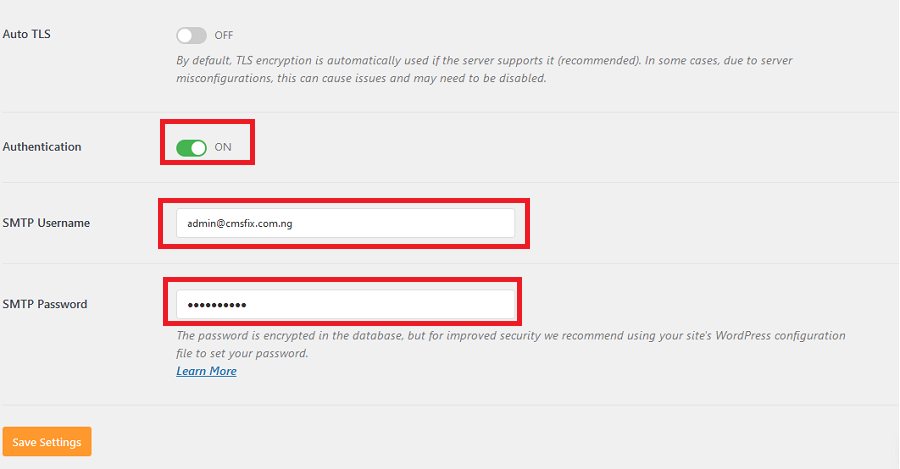
Use the following settings to complete SMTP configuration;
Mailer: Other SMTP
SMTP HOST : localhost
Encryption: None
SMTP port: 25
Auto TSL: Off
Authentication: On
SMTP Username: Use an existing domain email
SMTP Password: Use the password to the email
From name: Enter preferred name of sender
From Email: Enter the preferred email to display in the from area
Step 4.
Once you complete the configuration, click on Save Settings at the bottom of the page
Step 5.
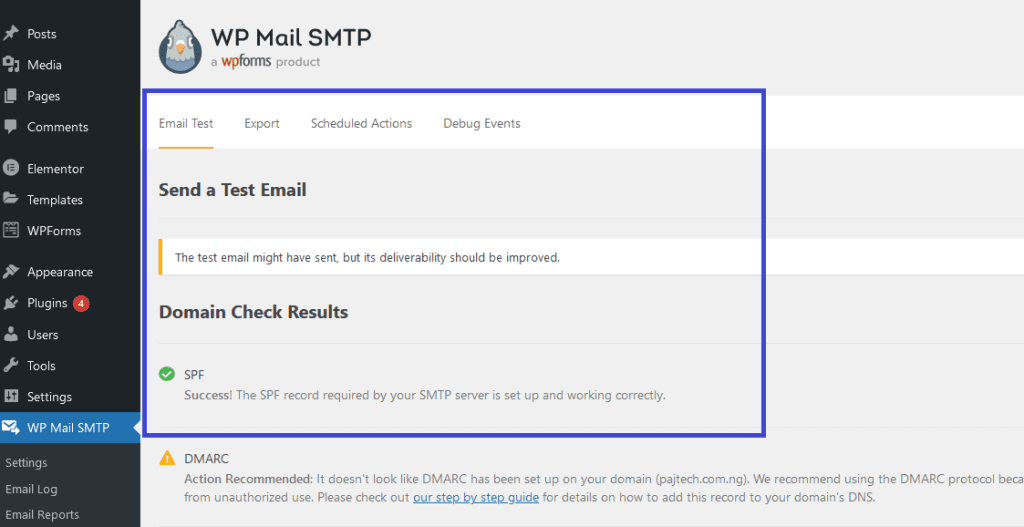
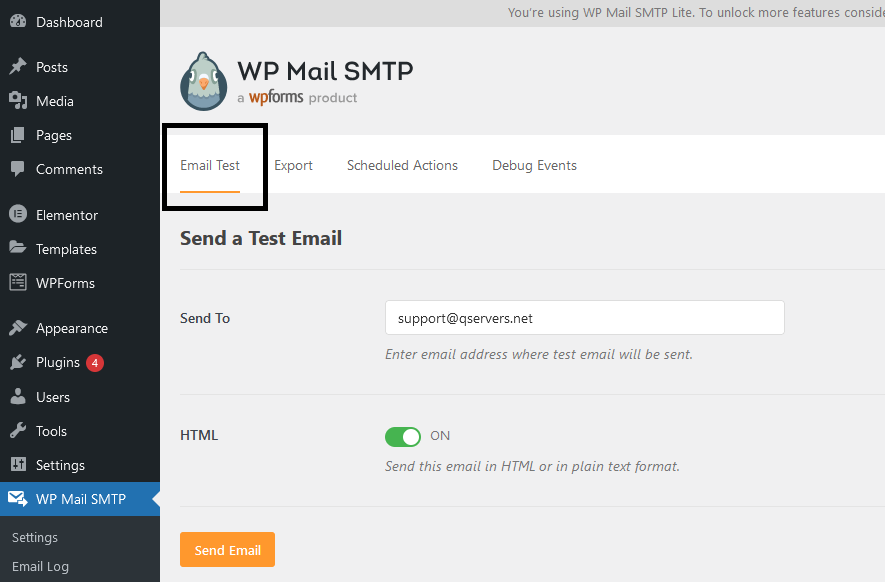
To confirm if the configuration works, click ‘Email Test’ at the top of the settings screen. Enter the address you wish to receive the test mail and click on ‘Send Email’
We hope this article was useful to you.


